Quick Start Guide
This document is intended to help users setup software development environment for application development on 4G LTE, GSM and NB-IoT modules using Logicrom software development kit.
Setting up Development Environment
Logicrom is supported by both PlatformIO IDE and Arduino IDE with Arduino wiring support. Users can select IDE of their choice though our recommendation is to go with PlatformIO.
PlatformIO IDE
PlatformIO IDE is the next-generation integrated development environment for IoT. More information about PlatformIO.
Quick Installation steps for PlatformIO IDE
Download and install official Microsoft Visual Studio Code. PlatformIO IDE is built on top of it.
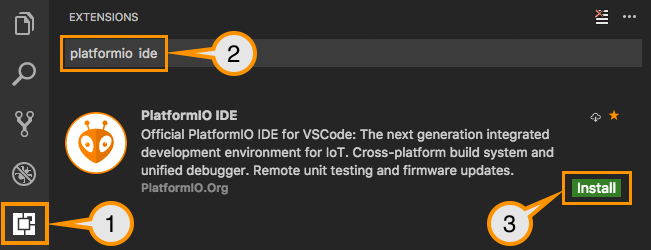
Open VSCode Package Manager.
Search for the official PlatformIO ide extension
Install* PlatformIO IDE.
Installing Logicrom Platform
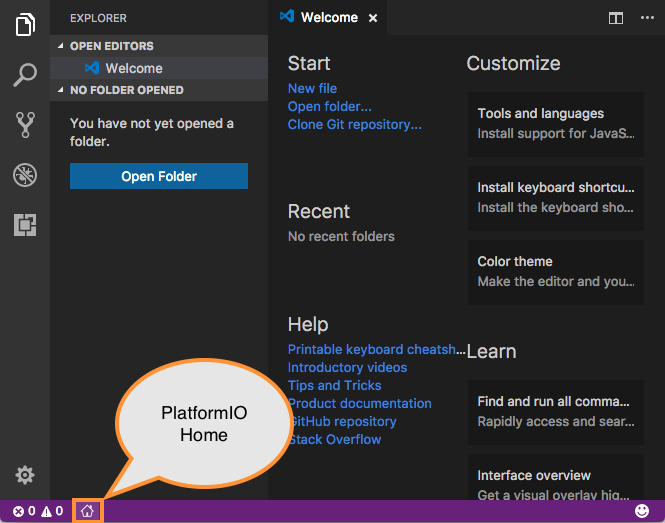
Click on “PlatformIO Home” button on the bottom PlatformIO Toolbar
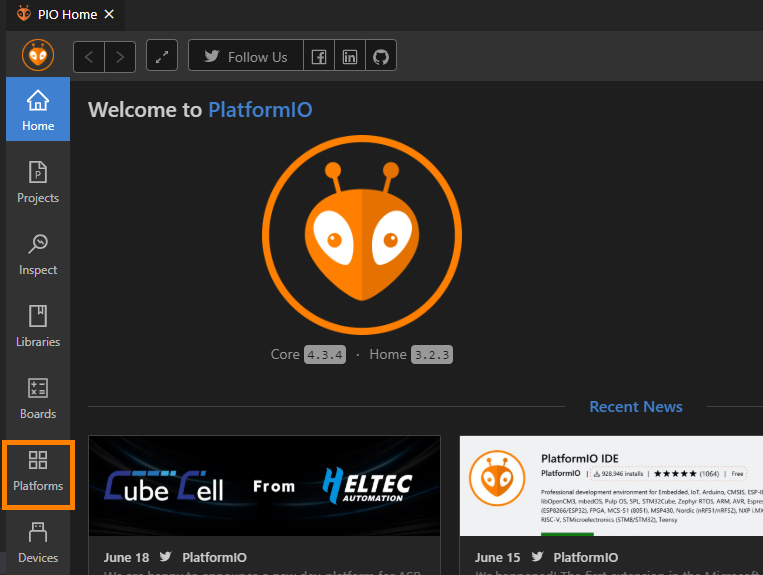
Click on “Platforms” Button on the left sidebar of PlatformIO Home.
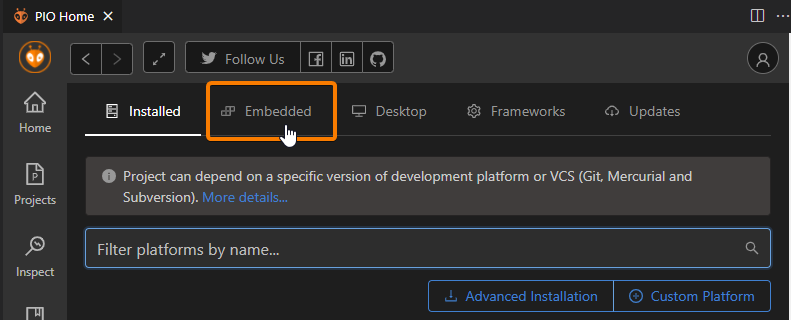
On Platforms Page, Click on “Embedded” button on the top toolbar.
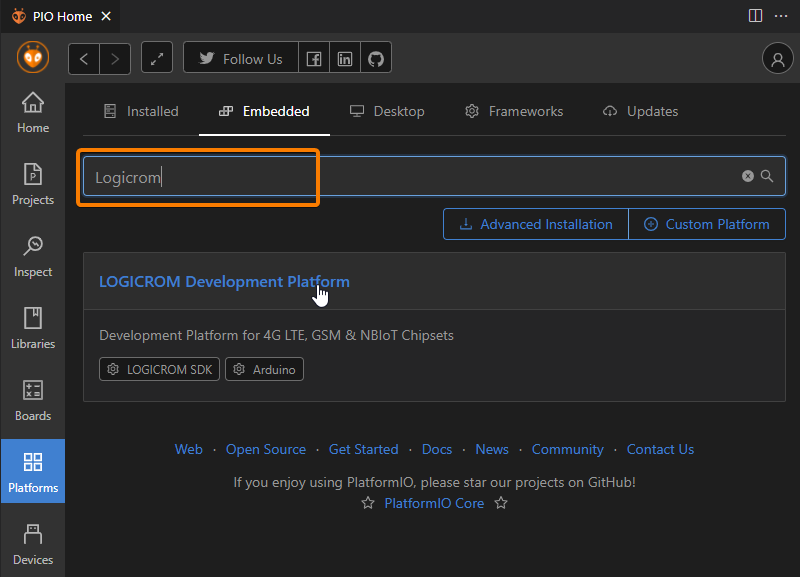
Type “Logicrom” in the search box as shown, and click on “Logicrom Development Platform”.
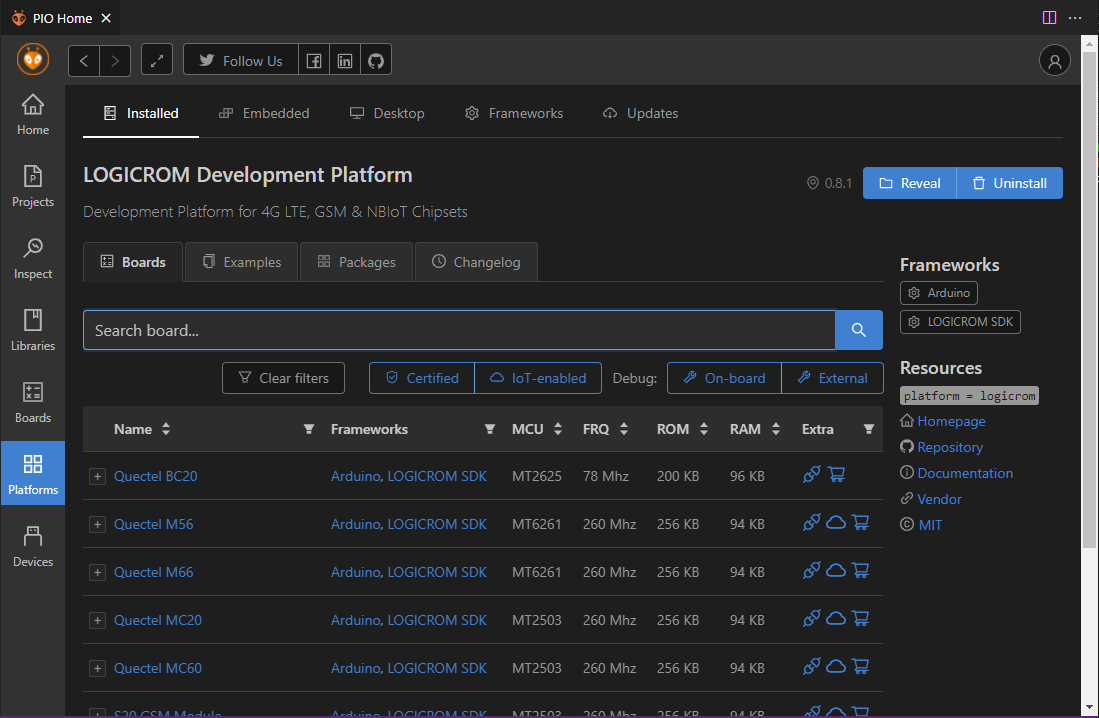
On Logicrom Platform page, Click install button as shown.
You have successfully installed Logicrom Platform
Setting Up the Project
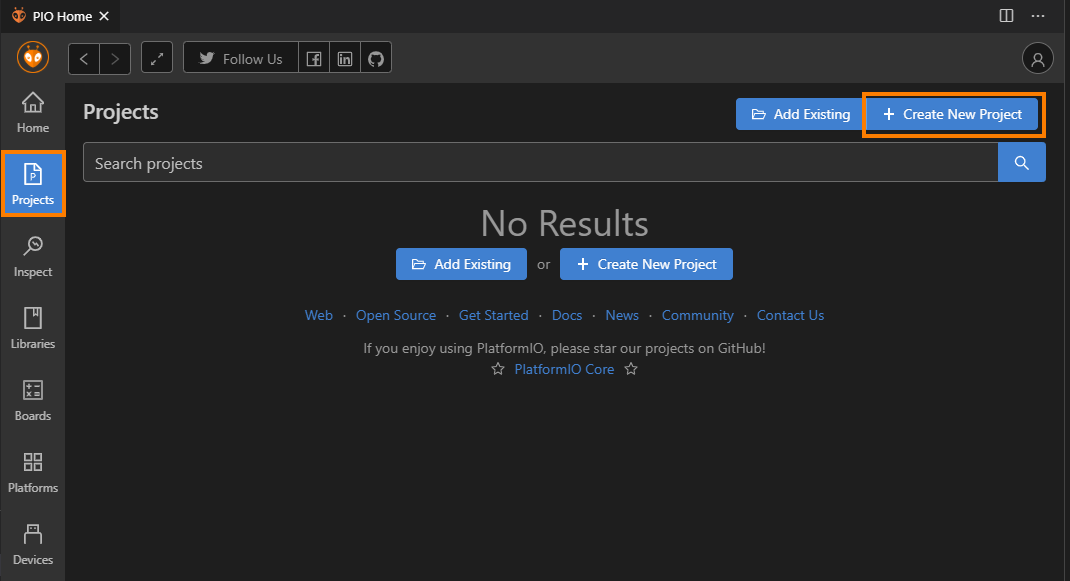
Go to “Projects” from PlatformIO Home and click “Create New Project” button.
Configure Project settings: * Name: Name of project * Board: Select board from dropdown * Framework: Select from “Arduino” or “LogicromSDK” frameworks * Location: To use custom location, un-check “Use default location” and select project folder. * Click finish to create project.

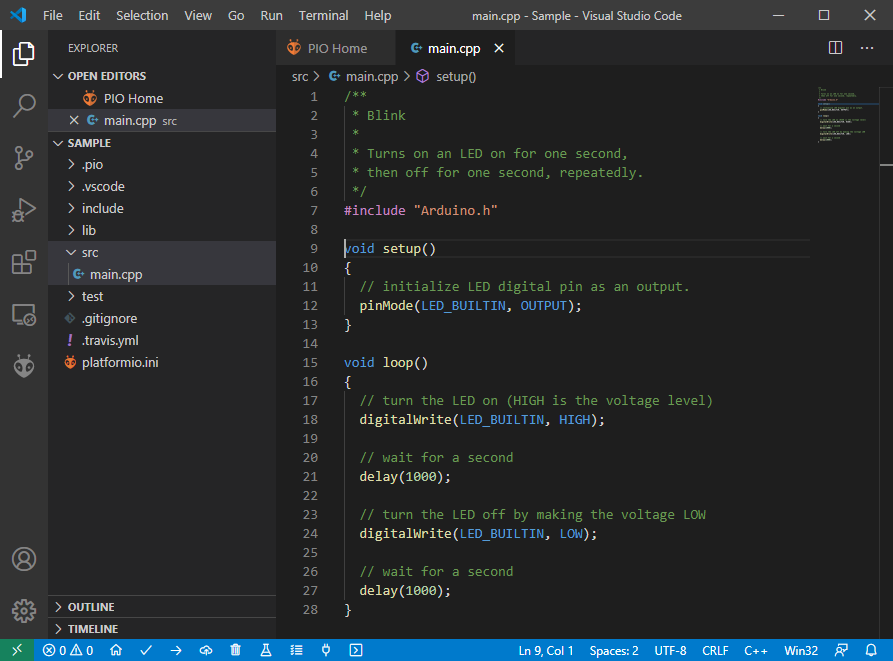
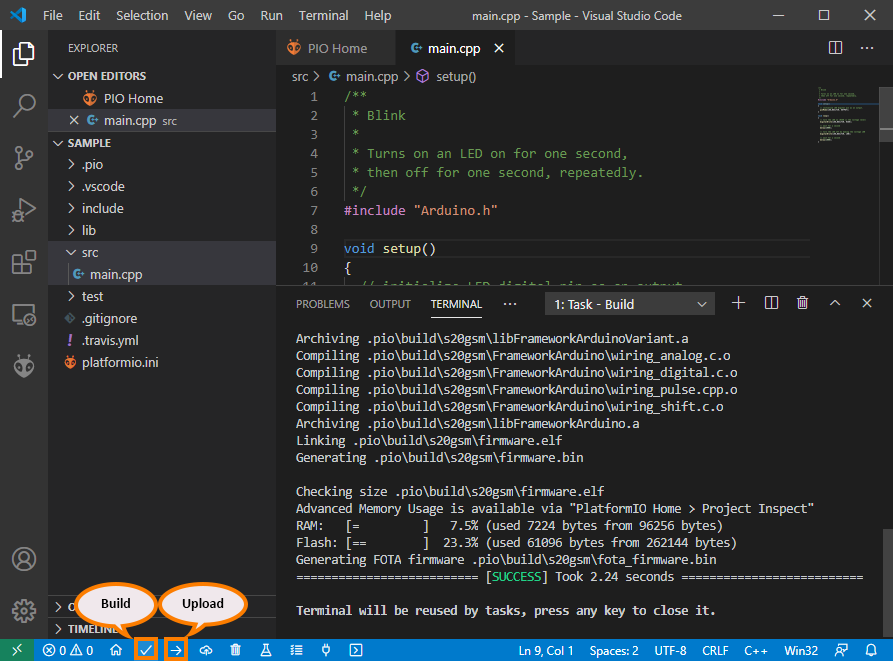
Open
main.cppfile formsrcfolder and replace its contents with
/**
 * Blink
 *
 * Turns on an LED on for one second,
 * then off for one second, repeatedly.
 */
#include "Arduino.h"

void setup()
{
  // initialize LED digital pin as an output.
  pinMode(LED_BUILTIN, OUTPUT);
}

void loop()
{
  // turn the LED on (HIGH is the voltage level)
  digitalWrite(LED_BUILTIN, HIGH);

  // wait for a second
  delay(1000);

  // turn the LED off by making the voltage LOW
  digitalWrite(LED_BUILTIN, LOW);

   // wait for a second
  delay(1000);
}
Build your project with ctrl+alt+b hotkey (see all Key Bindings in “User Guide” section below) or using “Build” button on the PlatformIO Toolbar.
Serial Port Configuration
To setup serial port for upload and monitor, You can edit project configuration file platform.ini
in project source tree.
[env:s20gsm]
platform = logicrom
board = s20gsm
framework = arduino

; Upload Port
upload_port = COM1
upload_speed = 921600 ; Default is 460800

; Monitor Port
monitor_port = COM2
monitor_speed = 115200
Setting Debug Build Environment
User can add extra configuration in platform.ini to build project against
logicromsdk debug library.
; Debug env
[env:s20gsm_debug] ; Env Name
platform = logicrom
board = s20gsm
framework = arduino

build_type = debug ; Build Type
debug_build_flags = -Os -g2 ; Extra flags for build
Each environment in platform.ini file has its own task list which can be executed from “Project Task”
list as shown below.
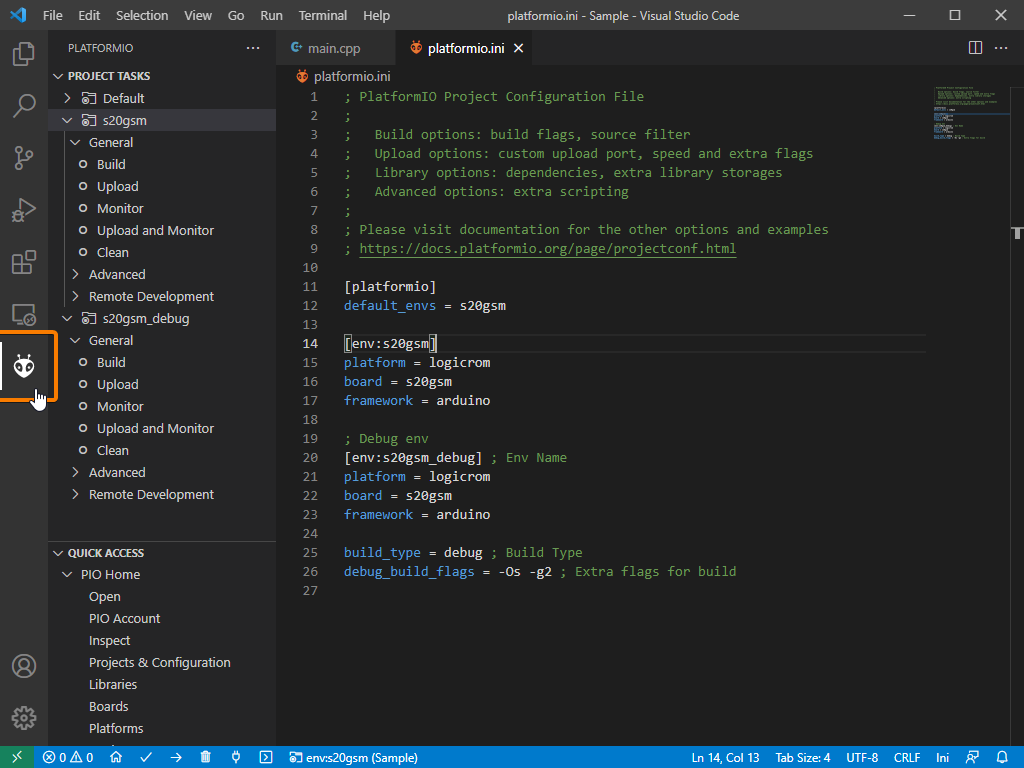
User can add as many configuration as needed, with different boards etc. using same source.
For advanced configuration settings of platform.ini Please refer official documentation of PlatformIO:
https://docs.platformio.org/en/latest/projectconf/index.html#projectconf
Arduino IDE
The open-source Arduino Software (IDE) makes it easy to write code and upload it to the board. More to read about Arduino IDE:
Installing Logicrom Platform
Download and Install Arduino IDE from Arduino website
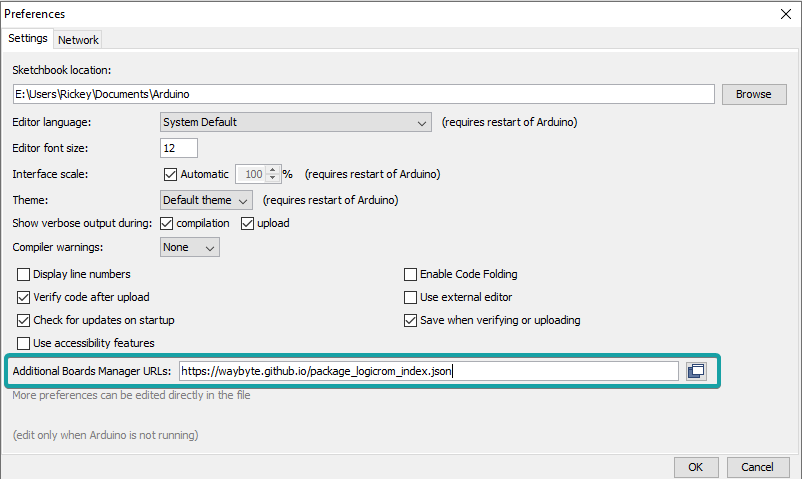
Open Arduino IDE, Go to File > Preferences
Add Logicrom Boards URL to Additional Board Manager URLs and click OK.
https://waybyte.github.io/package_logicrom_index.json
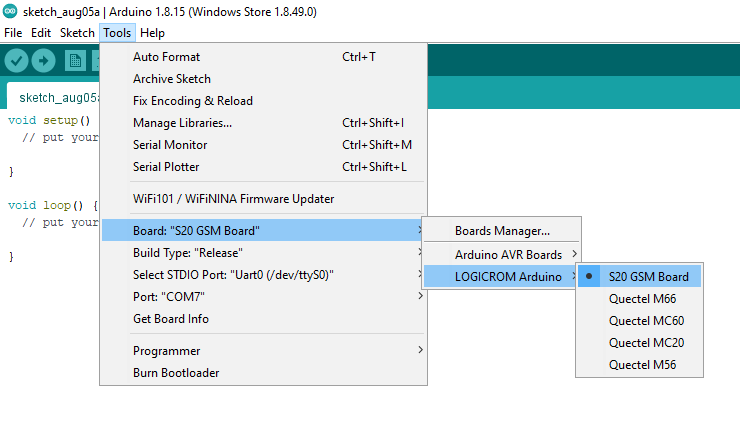
Go to Tools > Board > Board Manager
In search box, type “Logicrom”
Click Install button for Logicrom Arduino Boards.
Select your GSM board from board manager under “Logicrom Arduino”
Support
Need help in installation or setup? or Post issues on our GitHub page @ https://github.com/waybyte/platform-logicrom/issues